Mini Treat Pouch
 |
| Mini Treat Pouch |
Happy Saturday! Today is going to be the last of the mini treat bags series using 6 x 6 inch paper. This is a popular treat pouch and can be made with any size square paper. There are many different examples of this style out there but here I'm showing the basic folds.
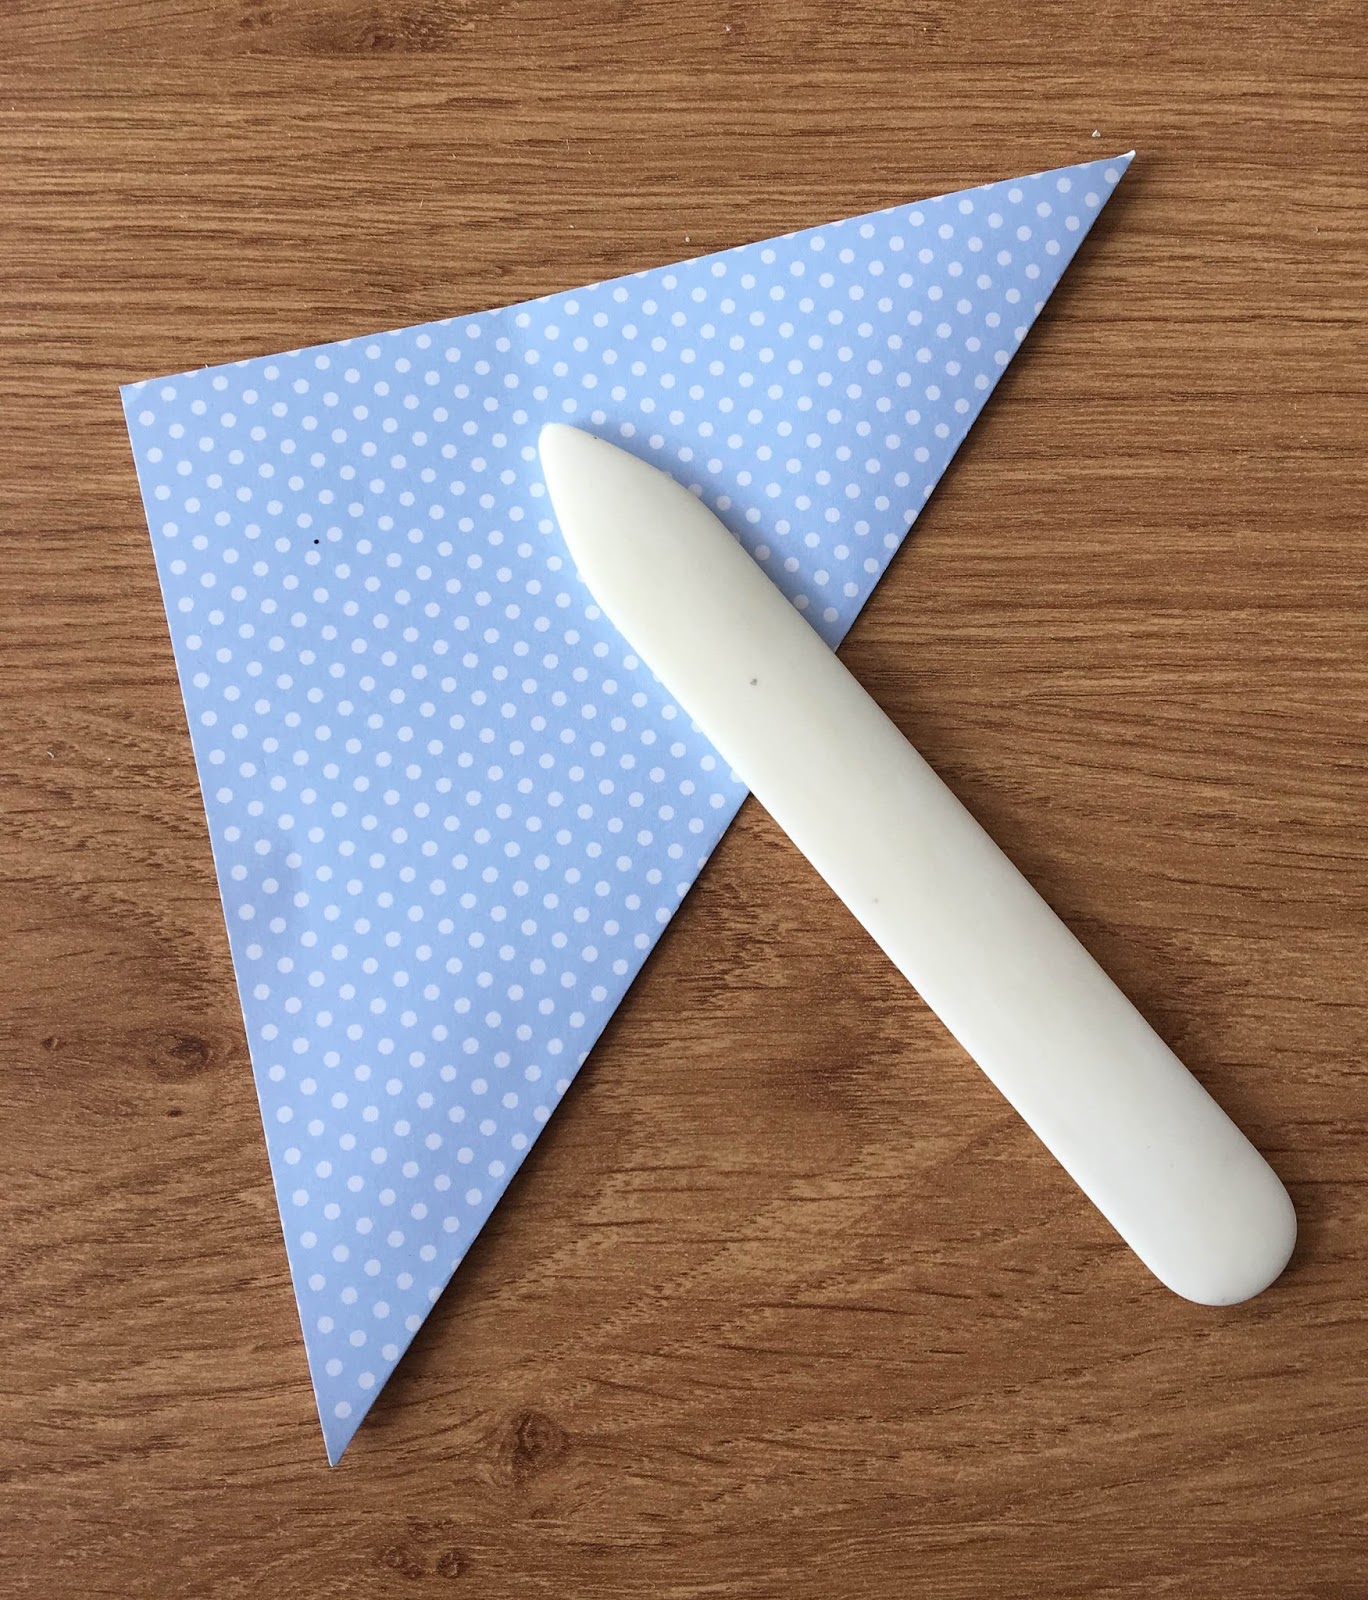 |
| Step 1 |
Step 1: Fold the paper diagonally and crease with a bone folder if the paper if the paper is quite thick.
 |
| Step 2 |
Step 2: With the open point at the top, take one of the bottom corners and bring across so that the paper is as straight as possible beneath the point at the top. Press down the fold firmly.
 |
| Step 3 |
Step 3: Bring up the opposite side so that it lays across the horizontal part of the fold made in step 2. Crease the fold firmly.
 |
| Step 4 |
Step 4: Bring down the top layer of paper from the top triangular piece and fold over the top of the previous folds. Crease the fold firmly.
 |
| Step 5 |
Step 5: Put your hand inside and gently open out the pouch. it will hold its own shape.
This type of pouch looks particularly good when double sided paper is used.
Decorate and fill with treats.
I really hope you try some of the treat pouches and bags I've shown. I would love to see what you make too.
Have a great weekend - stay warm, I hear it's going to be a chilly one! Autumn (Fall) is definitely here!
JC x
No comments:
Post a Comment